Most Windows applications and software contain code that initiates communication with external sources. This communication might involve checking for updates, patches, or, in some cases, could be associated with malicious software sending personal information.
Monitoring these Communications
Several methods can help you identify which programs and apps are sending data to the internet and external sources. Some of these methods are more effective than others, so it’s a good idea to try them all to determine which one suits your needs best.
Step 1
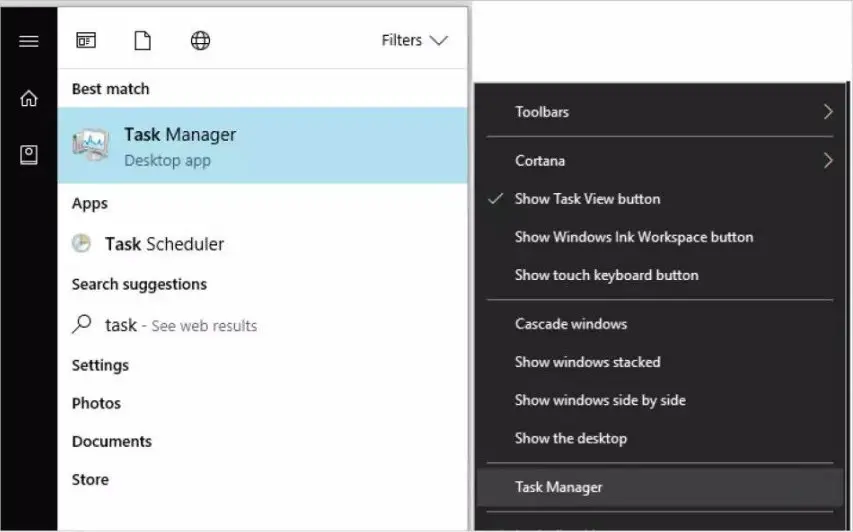
Start by using Task Manager to keep track of the apps accessing the internet. Click the Windows Start button and type “task,” then select the Task Manager result from the search box. Alternatively, you can right-click the taskbar and choose Task Manager from the menu.
Step 2
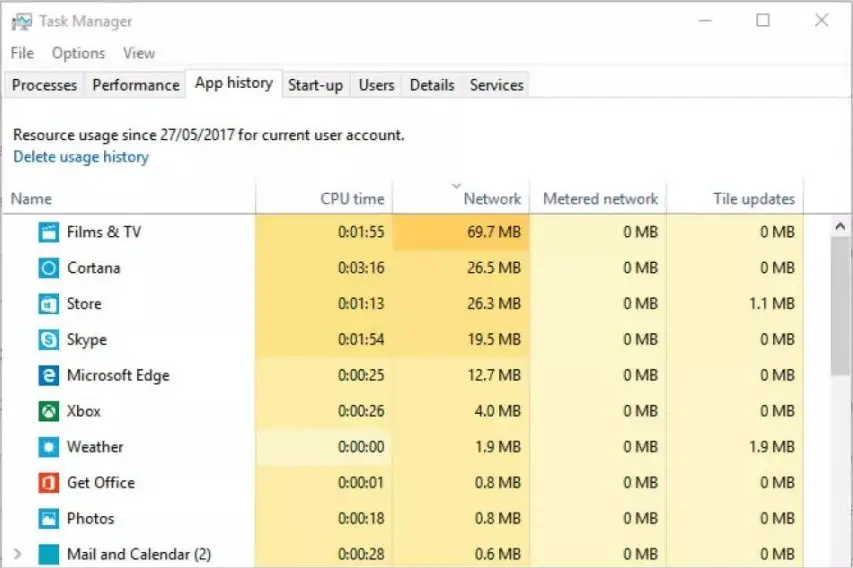
Once Task Manager is open, click on the “More Details” arrow (if available) to expand the Task Manager options. After that, select the “App History” tab, and then click on the “Network” column, so that a downward-pointing arrow appears above it. This arrow indicates network usage in descending order based on the amount of data sent.
Step 3
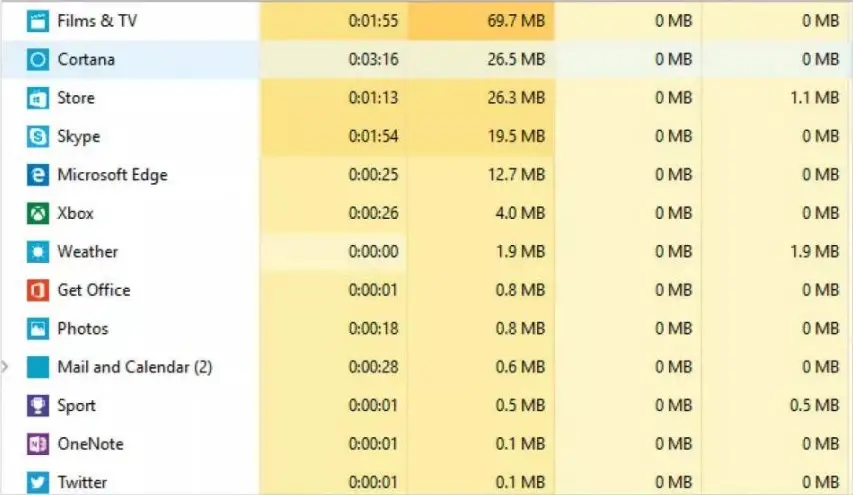
This method provides a reasonably accurate way to view which installed programs have been accessing the external network. It can be surprising to see the amount of data being sent to and from your computer, as you may not even realize you have a particular app installed, let alone that it’s communicating with an external source.
Step 4
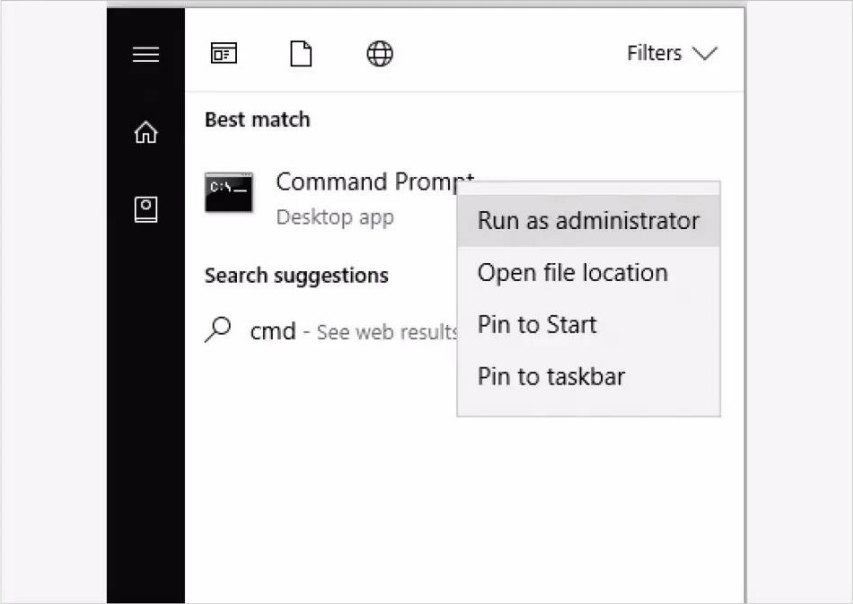
Another excellent method is to use the Netstat command. Click the Windows Start button, type “cmd,” and then right-click the “Command Prompt” option. Choose “Run as Administrator” from the menu. When the authentication prompt appears, click “Yes.”
Step 5
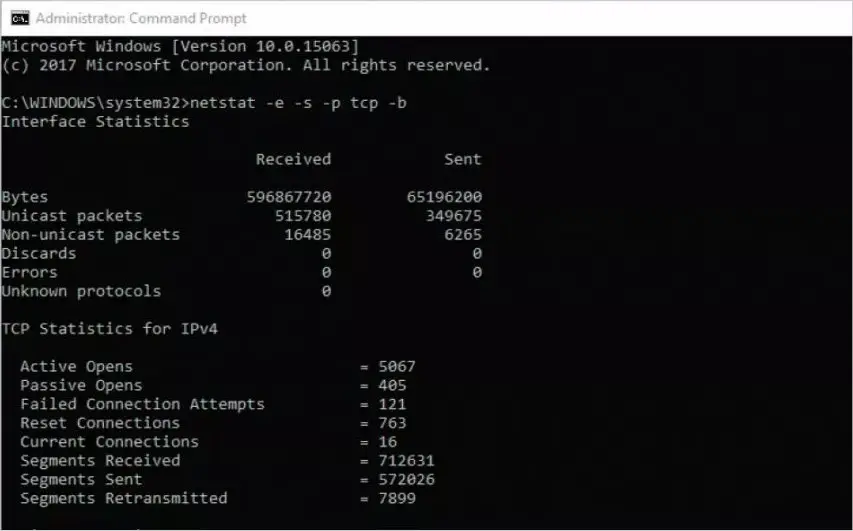
In the open command prompt, enter the following command: “netstat -e -s -p tcp -b“. The information will populate the command prompt box quickly, so scroll back to the top to view it in its entirety.
Step 6
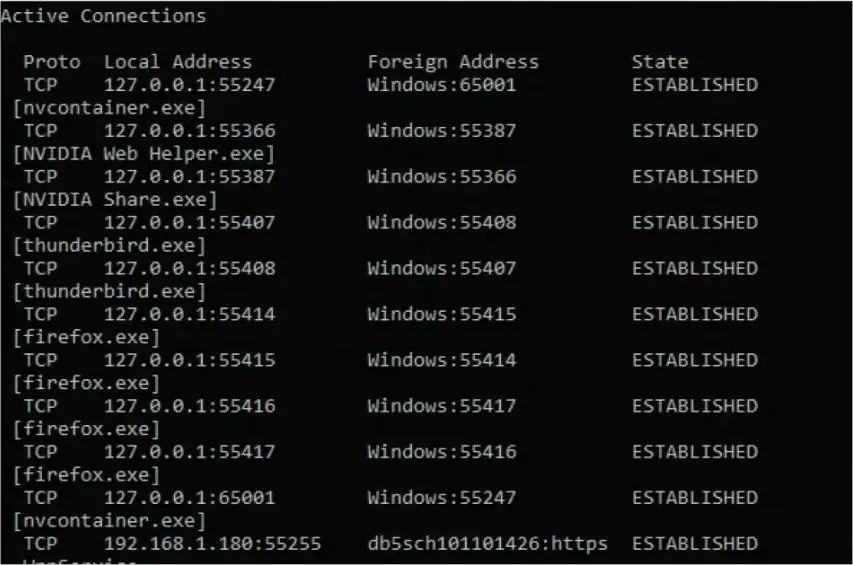
You’ll see a list of programs in the far left column, along with their source and destination IP addresses in the middle column. The third column indicates whether the connection is established or not. It may appear confusing at first, but after a moment, it should start making sense.
Step 7
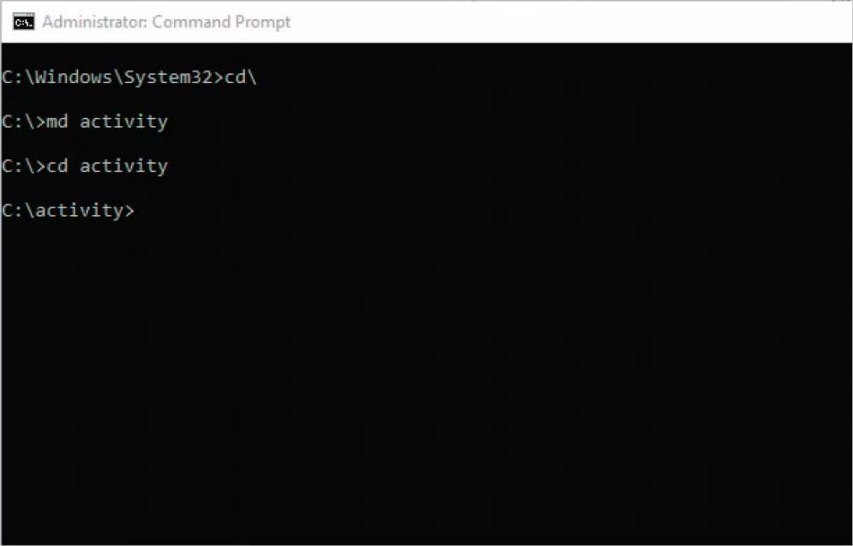
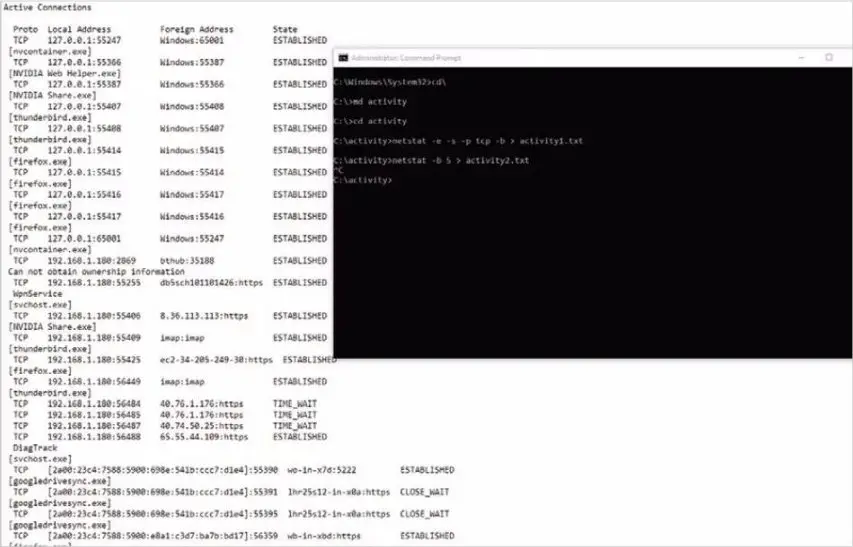
If you want a more user-friendly way to view Netstat’s active connection data, you can save the contents to a text file. In the command prompt, enter “cd\” to navigate to the root of the C: drive. Create a new folder named “activity” with “md activity“, and then enter it with “cd activity“.
Step 8
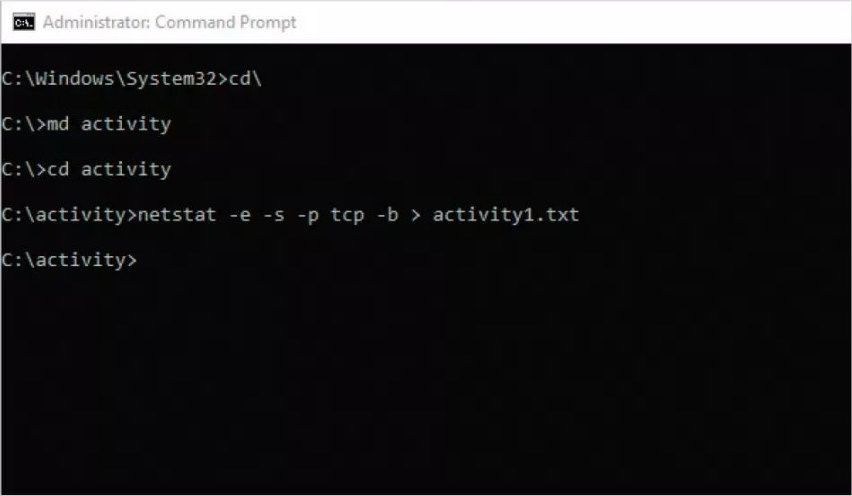
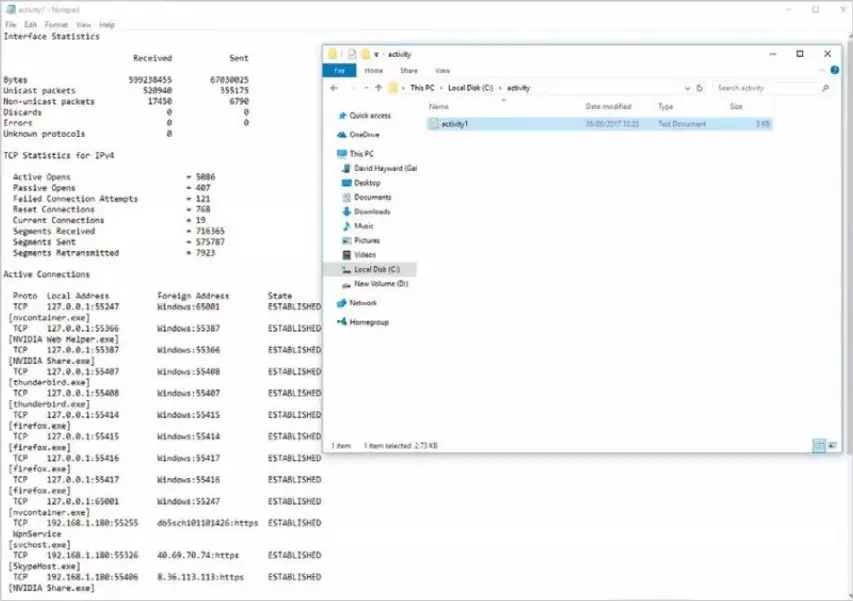
Inside the “activity” folder, enter the following command: “netstat -e -s -p tcp -b > activity1.txt“. This is the same command as before, but this time the output is saved in a text file named “activity1.txt” instead of appearing in the command prompt window.
Step 9
Use Windows Explorer to locate the “C:\activity” folder you created and open the “activity1.txt” file. It will open in Notepad, allowing you to read it without the difficulties associated with the command prompt window.
Step 10
To simplify the process and gather more concise information, enter the following command in the command prompt within the “activity” folder on the C: drive: “netstat -b 5 > activity2.txt“. This command records the information and only writes data to the text file once you press Ctrl+C to stop the process. Use this method for approximately two minutes to obtain a record of what’s happening.

Comments